Building Docker Containers and Pushing Them to Docker Hub With Azure DevOps Pipelines
In this article the steps to create an Azure DevOps Pipeline that builds and pushes a Docker container image to a private Docker Hub Repository are discussed. It is assumed that you, the reader, are already familiar with Azure DevOps and Docker, specifically dockerfiles, and that you have a private Docker Hub repository already set up.
In Azure DevOps, the following git repository structure is setup (noting only the layout relevant to this article is shown)
- jasonneurohr-dot-com
- nginx
- dockerfile
- .dockerignore
- default.conf
- nginx.conf
- referrers.bad
- web
- web
- web service source…
- dockerfile
- .dockerignore
- …
- web
- webadmin
- webadmin source …
- dockerfile
- .dockerignore
- …
- nginx
The focus will be on the NGINX container in this article.
The Dockerfile
The NGINX Dockerfile is straightforward and shown below for reference. For more information on the NGINX docker image click here for there official Docker Hub page.
Azure DevOps Pipeline
Docker Hub Service Connection
A Service connection definition is required with the DevOps Project settings to facilitate uploading Docker images to a Docker Hub private repository.
Open the Project, then click Project settings, then click Service connections.

Click + New service connection and select Docker Registry.
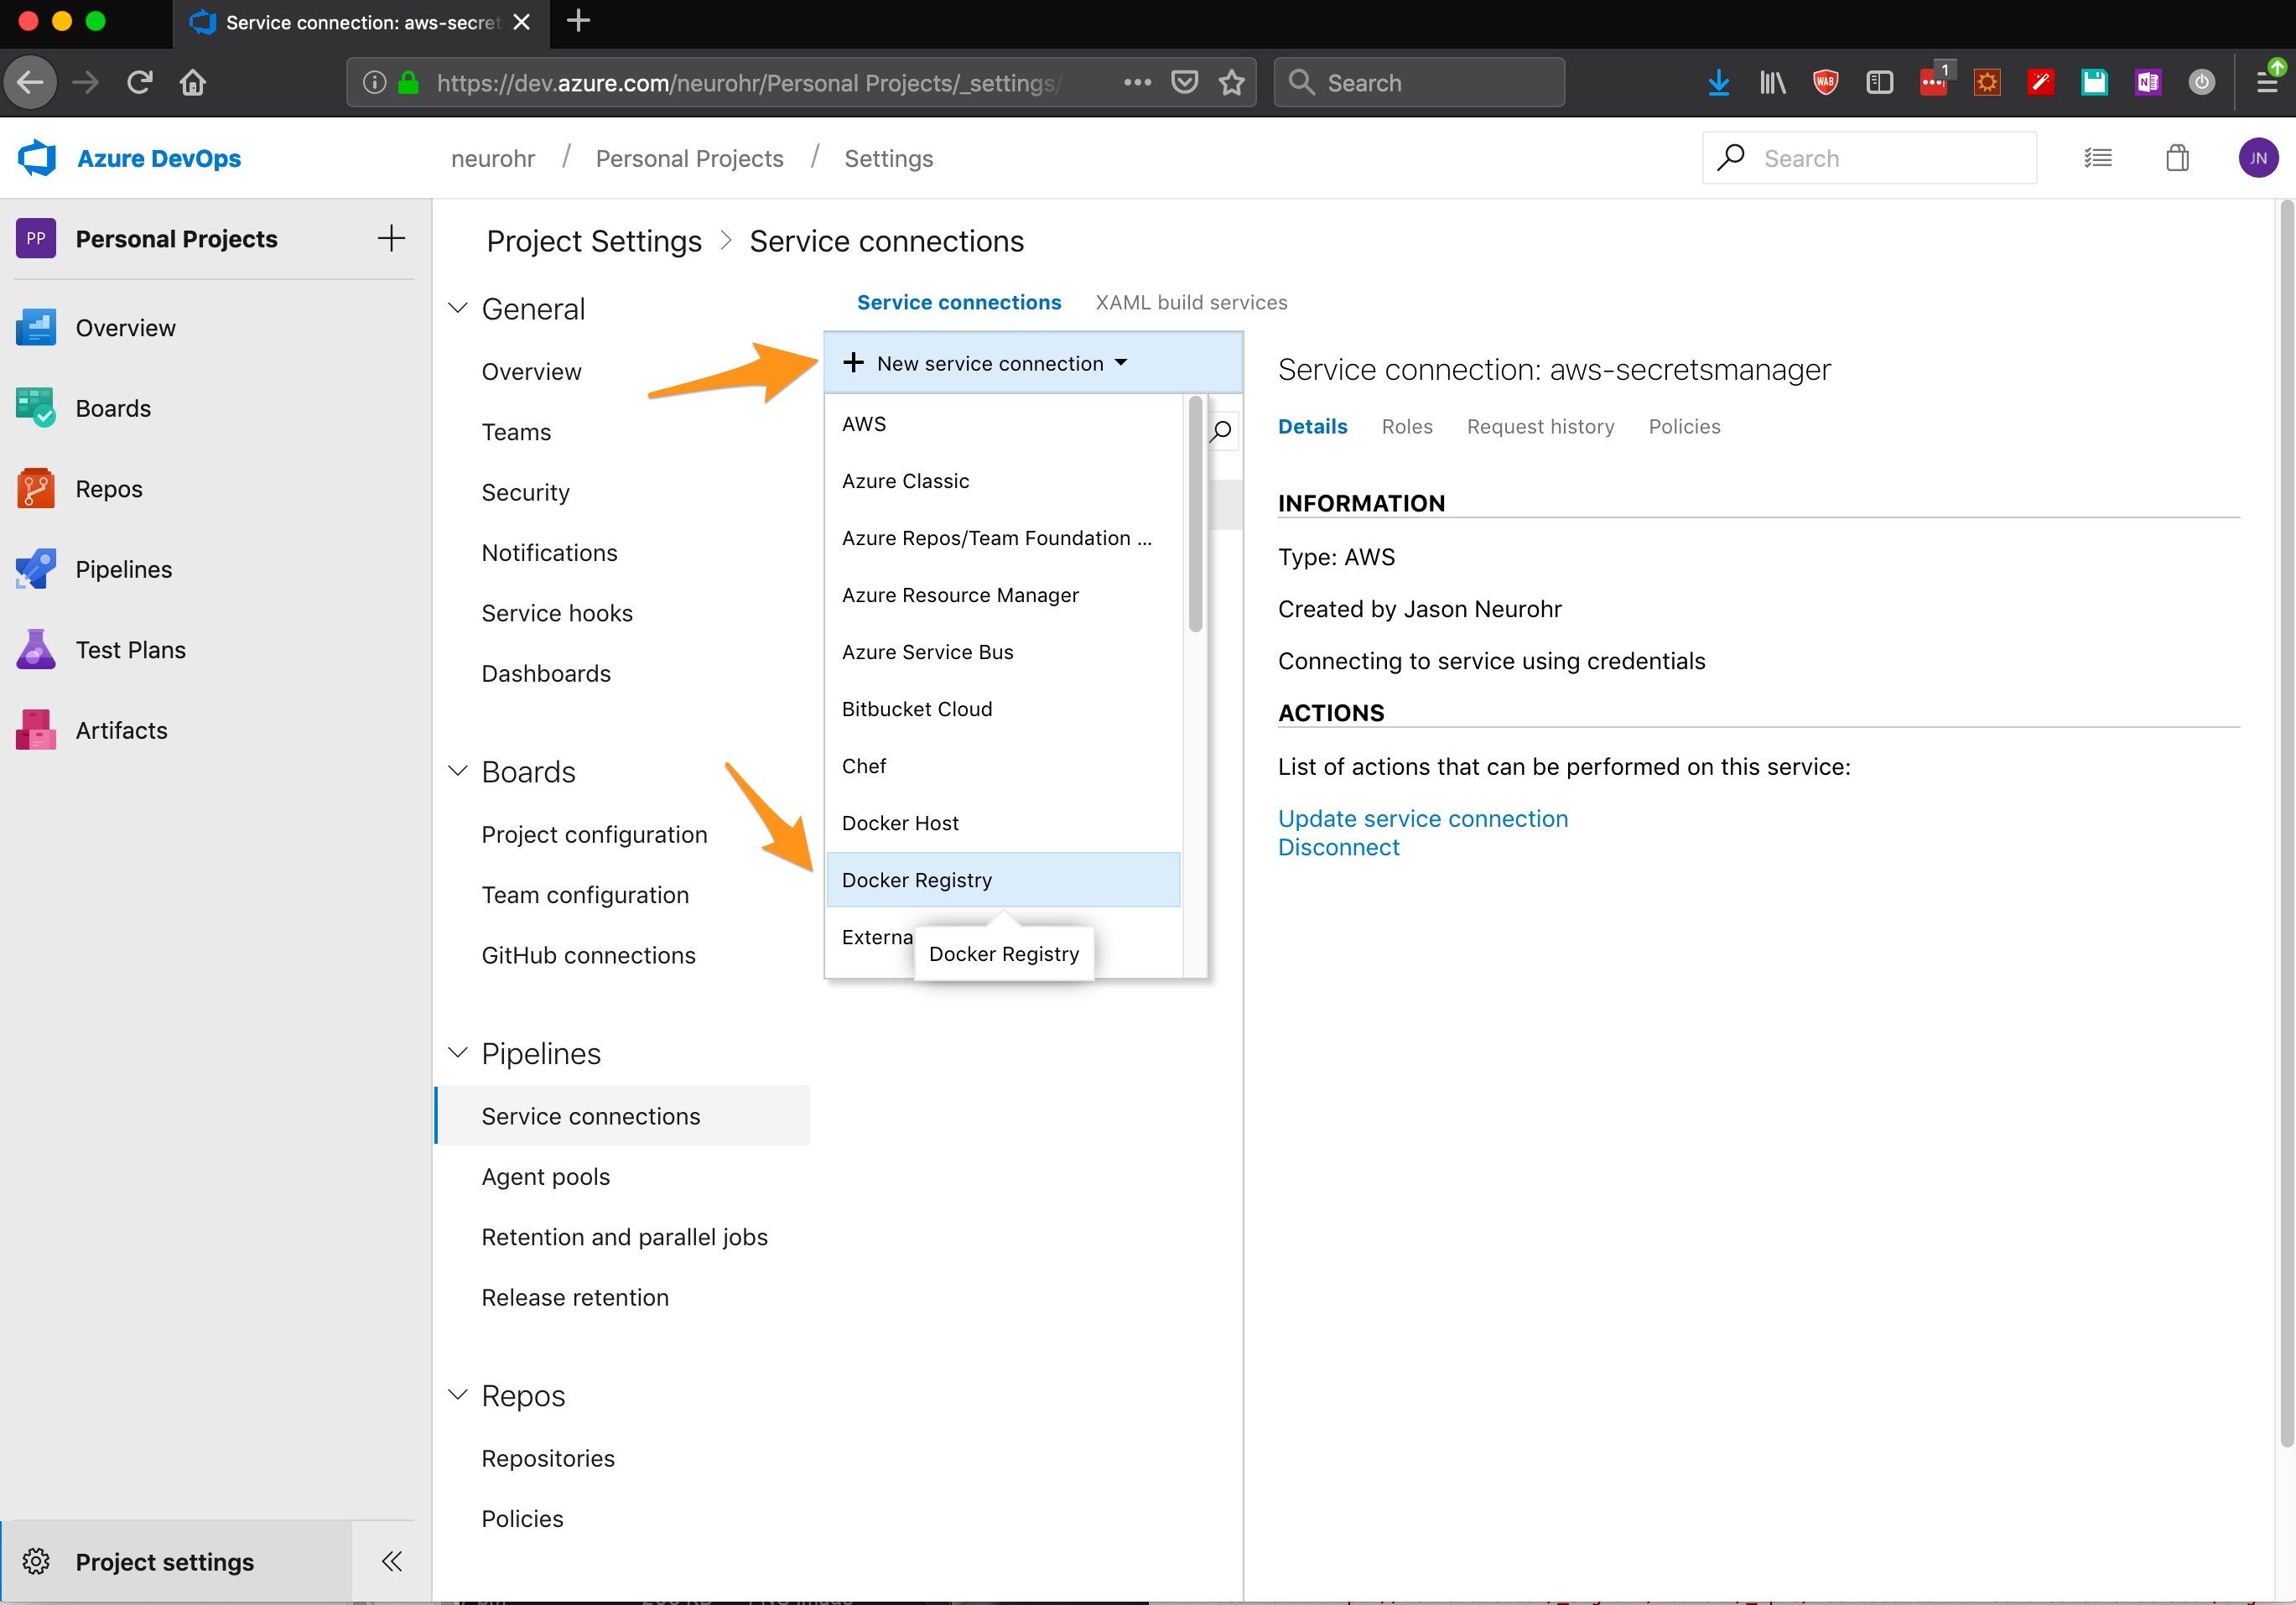
Give the connection a meaningful name and then enter the Docker Hub ID, password, and email address. Click Verify this connection.

Once it has verified successfully, move on to create the Pipeline.
DevOps Pipeline
At a high level, the Pipeline will perform three main tasks.
- Build the docker image from the dockerfile specification
- Authenticate with Docker Hub
- Push the image to Docker Hub
Log into Azure DevOps and navigate into the Organisation > Project where the Pipeline will be created.
Click +New and select New Build Pipeline.

Select the source repository, in this case, an Azure Repos Git. Click Continue.

Select the Docker container template. Click Apply.
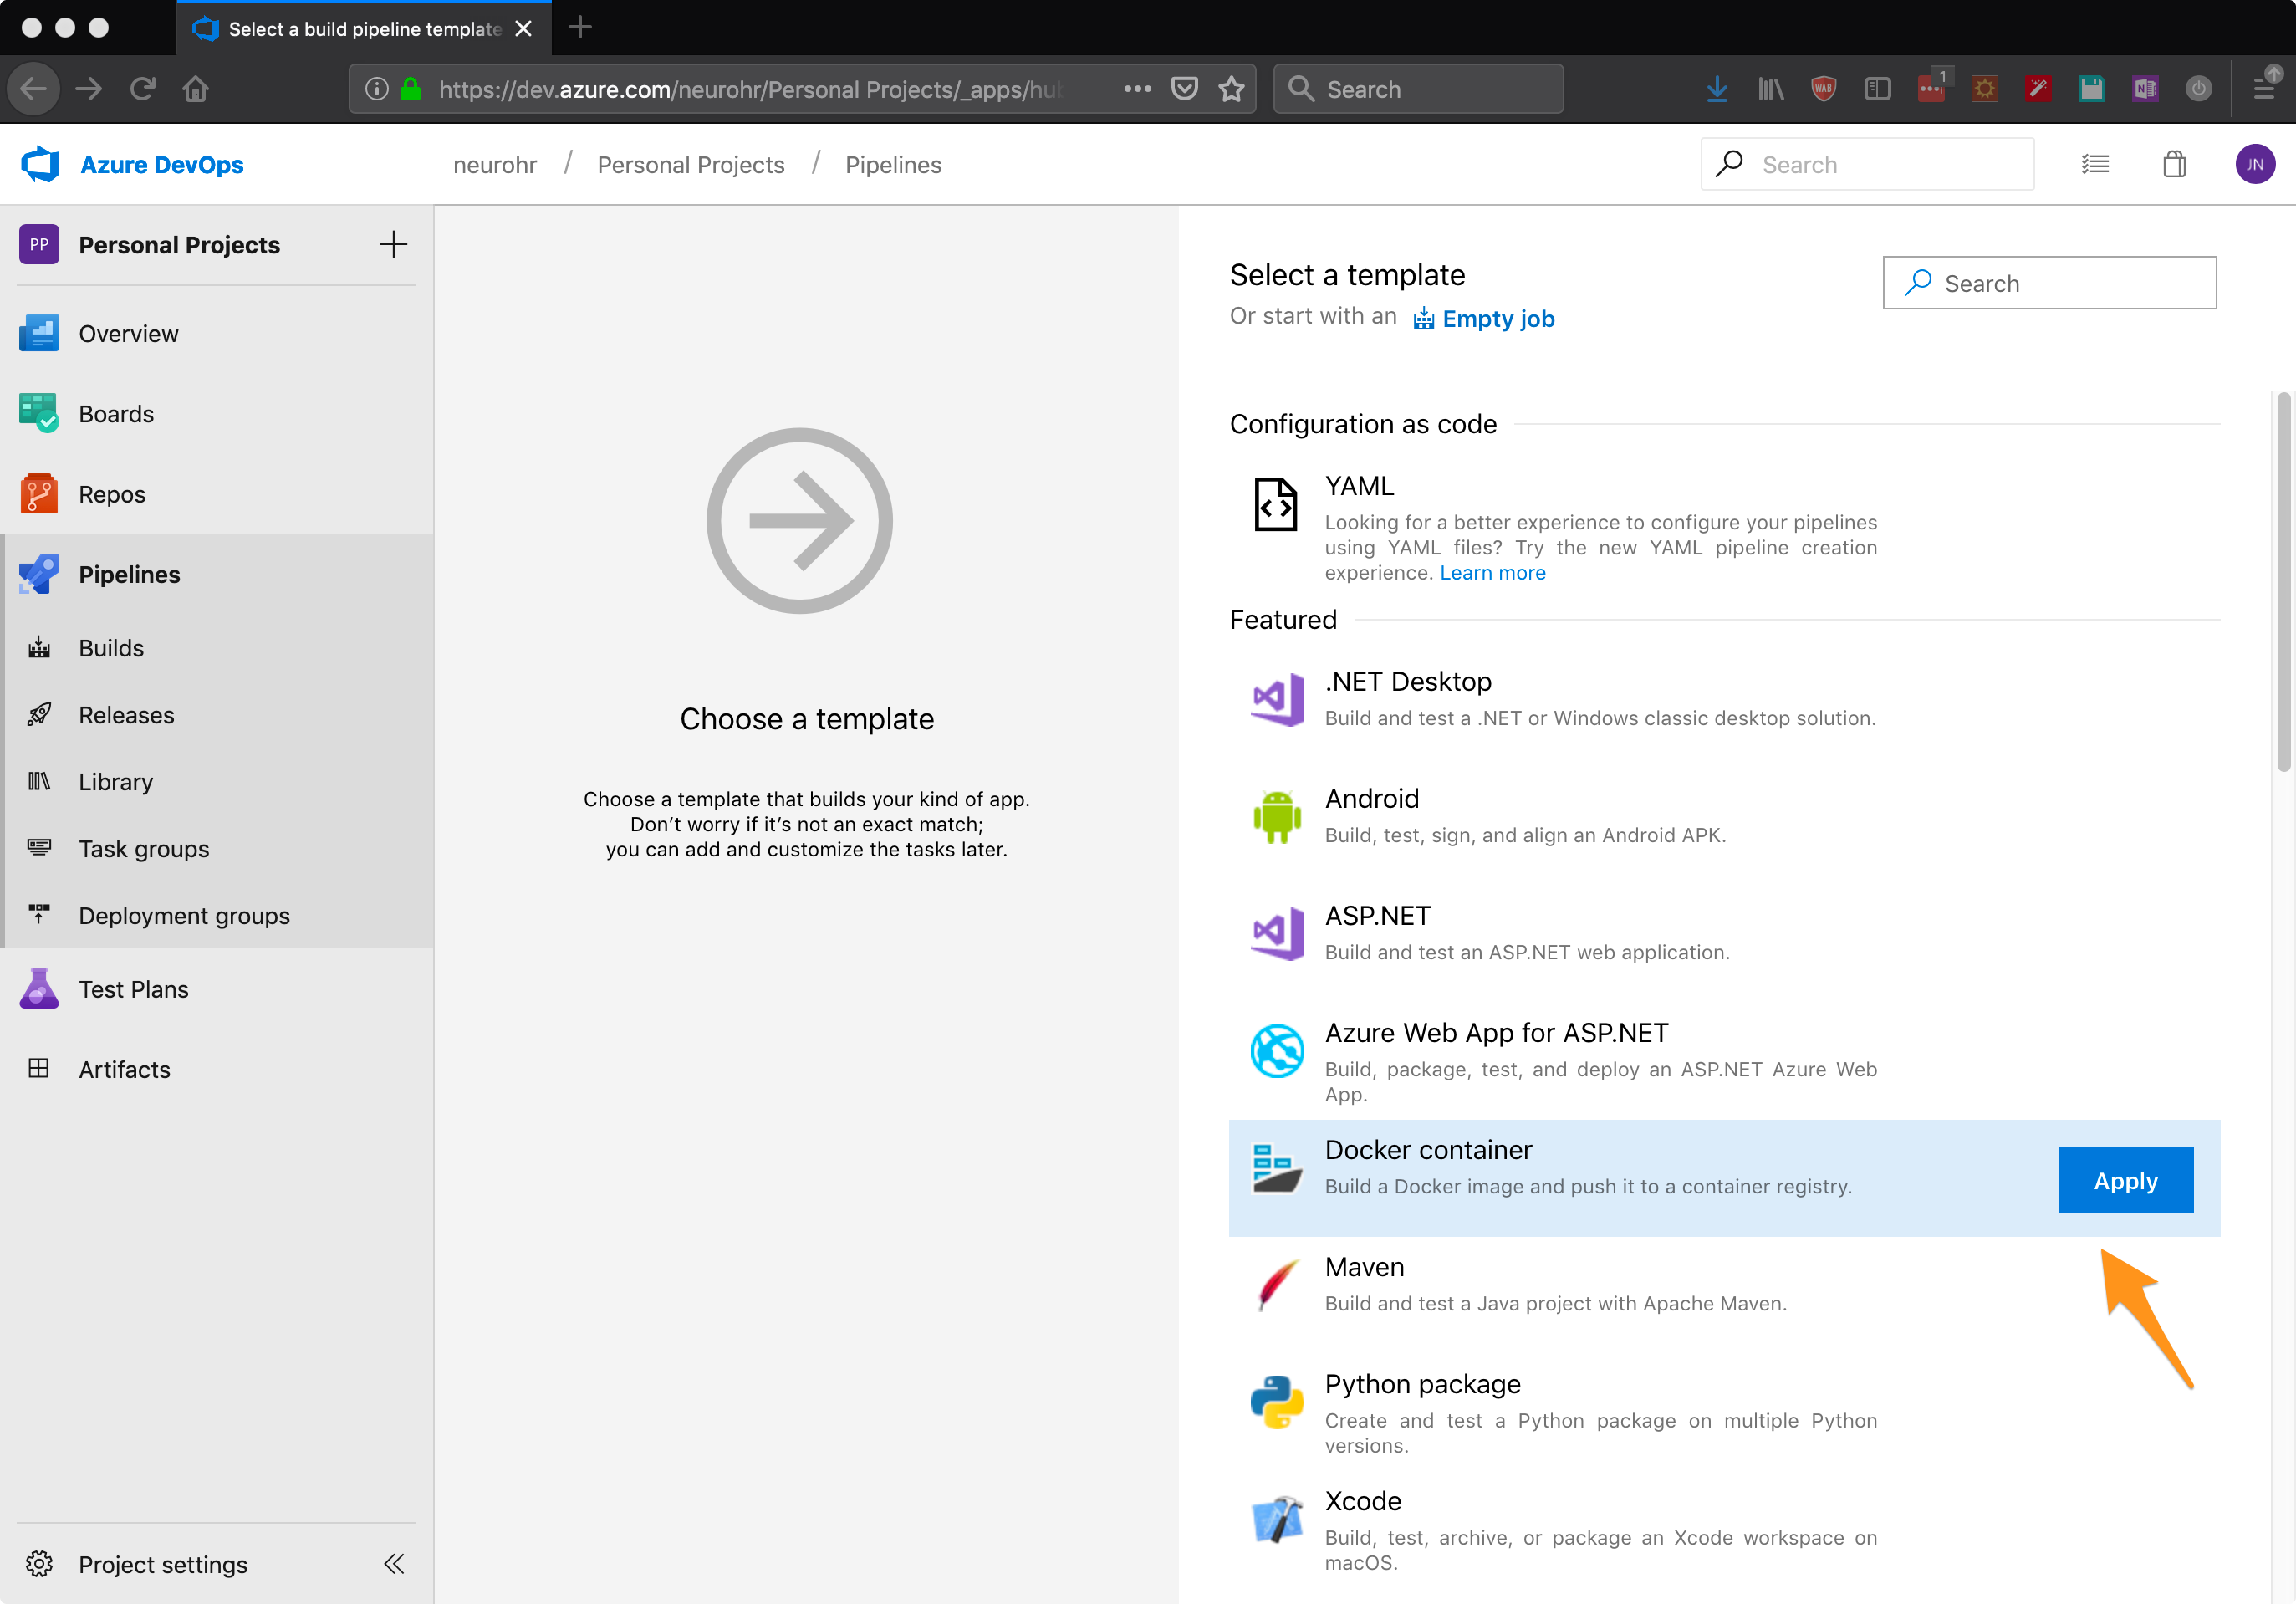
The following Pipeline screen is displayed with two Docker tasks present in the Pipeline. At this point, the Pipeline should be configured with a meaningful name.

Next add a third Docker task by clicking ‘+’, searching for docker, and clicking Add on the Docker task.

Next, select the first task, and change the task version to 1.*. Then configure the rest of the task as shown. This task will build the actual docker image.
- Display name - something meaningful
- Container registry type - select Container Registry
- Docker registry service connection - select the service connection created earlier
- Dockerfile - enter the path to the dockerfile, as noted earlier in this repository it is within the nginx folder
- Image name - set the image name to be dockerhubusername/dockerhubrepositoryname:tag

Next select the second task, again change the task version to 1.*. Then configure the rest of the task as shown. This task authenticates to Docker Hub.
- Display name - something meaningful
- Container registry type - select Container Registry
- Docker registry service connection - select the service connection created earlier
- Command - login

Finally, select the third task which should already be set to version 1.* (if not then update it). Configure the pushes as shown. This task pushes the container image to Docker Hub
- Display name - something meaningful
- Container registry type - select Container Registry
- Docker registry service connection - select the service connection created earlier
- Command - push
- Image name - set the image name to be dockerhubusername/dockerhubrepositoryname:tag

At this point, the Pipeline can be saved and run by clicking save and queue. However, the builds should automatically occur which requires the configuration of a trigger.
Click Triggers, and then click Enable continuous integration. This repository has several container services within it and there will be a Pipeline for each, to avoid triggering this Pipeline if there are no changes to it specifically a Path Filter to include the path /nginx will be added; this ensures the Pipeline is run only if changes to the master branch within the /nginx path are made.
Configure the Trigger as shown below, and then click save and queue.

If everything has worked correctly, the build will be successful.

The container image should now also be in the Docker Hub repository.
